I don't ever want this site to become one of those 'buy this, this is neat' sites. Everything I will talk about will be something I have bought. I will always try to review things completely and give my honest opinions and recommendations. That being said, this post is going to be a little different. I've been waiting for this product from Khory (there's a link to her entire store) for a while. I've been a huge fan of her texture/material collections and her light sets for a long time. I'm not one to use pre-made light sets often. Generally, unless it is a set designed to work with a particular prop or environment, I buy light sets for inspiration and for adapting to my own needs. Khory always came up with unique lights and I always tried to pick them up to see what I could learn.
When Khory said (on the forums) she was working on a lighting package for Iray, I knew I was going to buy it. What I didn't realize is that it would instantly leap to the top of my recommended products list. I have not had a chance to use it much, it just came out yesterday (Monday, now, its taken me awhile to get this together), but it is so important that I felt I had to write something about it and to do it quickly (it is March Madness after all).
So what separates this light set from all the other light sets available? Tone Mapping. If you know me at all, or have read any of my blog/forum posts, you know that I am a firm believer in using Tone Mapping. What Khory has done here is produce 17 different light configurations and provide appropriate Tone Mapping settings for each one. This is a big deal. This is the first light package for Iray in Daz Studio that has done this.
Every other light product produced for Studio has used the default Tone Mapping settings and cranked the light intensities up to a ridiculous degree. While this may, technically, work, and be speedy. it is far from the optimal approach and can lead to unintended consequences.
A better option, a more realistic option, is to create lights that mimic the real world and then adjust your camera (Tone Mapping) the way a photographer would in the real world. The biggest resistance to this I have seen is people feeling like they don't want to mess with Tone Mapping because they don't understand it. Well, now you don't have to understand it and you don't have to guess: simply pick the light preview that matches what you want and load the corresponding Tone Mapping settings and you are done (or you could delve into it and look at how they are put together to be able to do your own!).
Tone Mapping can completely change the look of an image by adjusting how the render engine makes use of the available light in the scene. There are some caveats: Tone Mapping does add to the calculations performed by the render engine, so it can slow down the render; it is also not the solution to all problems, sometimes you do need more light or brighter light or something else. But the thing I always come back to is this: Iray is a photo real render engine, it behaves in ways consistent with the process of photographic imagery therefore we should treat is as a digital camera/photo studio. We have a hundred years worth of photographic techniques that we can adapt... these don't all rely on camera/film settings, but many of them do. Sometimes the answer is to fake the light rather than try to capture the "real light" because its the most expedient way to get the image.
That being said, one of the tools that all people who work in film rely on is how light interacts with film stock and how they can manipulate that through the settings available to them on their camera. Our camera is Studio, and the settings are exposed to us via the Tone Mapping tab on the Render Settings panel. There are quite a few settings on that tab and I can understand how it might be daunting if you don't now what the settings are for. Luckily, Khory has addressed some of this for us in this product.
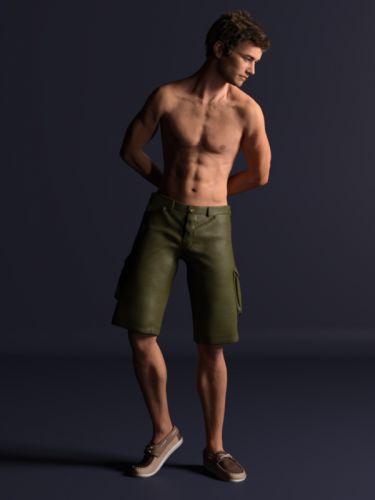
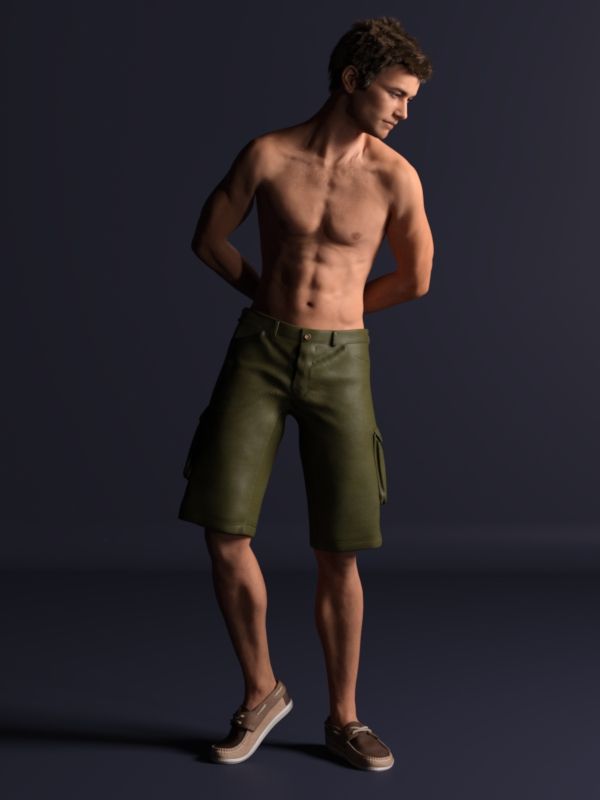
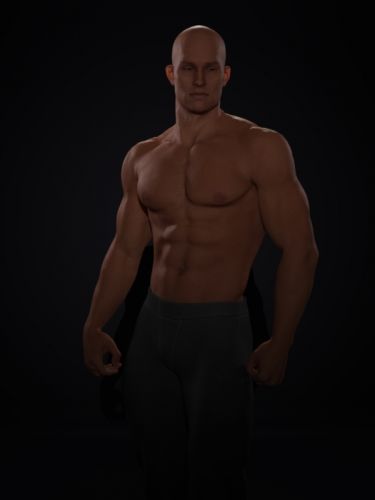
There are 17 light rigs, all different (using both spotlights and emissive surface planes to provide light -- and the emissive surface planes have a spotlight attached to help you reposition the light or just to see where it is pointing; also, each light rig is grouped together, making it portable... so if you are not working in the center of the Studio space or your character is not standing fully upright, you can grab the entire light rig and move it where you want) and for each light rig there are specific Tone Mapping settings designed to work specifically with those lights. I'm sure you can mix and match, though I haven't done that yet... and you can always alter the lights or the Tone Mapping to suit your tastes (in my image of Gianni I toned the lights down and boosted the Tone Mapping...Khory's lights are sometimes a little bright for my own artistic style).
One of these days I am going to write something more in depth on Tone Mapping, but for now... if you want to learn about lighting, or just want an expansive set of lights (these are billed as Portrait lights, and they obviously are... but they can be used, very easily, for lighting almost anything... with their variety and portability they are perfect utility lights), you can't go wrong with this package.
I should also note that Khory has included a simple "room" prop, that has three walls and a floor and comes with several different materials. The package also includes some advanced render settings to boost your image.
Scintillant Portrait Lights is still on sale, and if you keep your eyes open, I'm sure it will be featured again as a "Still Mad" release or as part of a catch up sale. And if Khory's store comes on sale again, be sure to check that out to... she's got some great stuff in there.
Click the tumbnails below to see the full size versions of this article's images.