
Lighting Outdoors in Iray with Sun and Sky (Part 1)
In response to some posts on Facebook, I thought it might be a good idea to demonstrate some lighting techniques in Iray. This is not a tutorial, its what I'd call a practical example. I'm going to build an image, piece by piece and talk about my choices along the way. I will do my best to point out options as I go, but this is not supposed to be an exhaustive resource, just a example of how one might go about setting up their lighting for an image.
The main impetus for this article was a render that used Stonemason's Enchanted Forest, Michael 4 and the DAZ Big Cat 2. I don't have Enchanted Forest ( I know, right?) but I do have Return to the Enchanted Forest. I chose to use Gianni 6 instead of Michael 4 because I wanted to use one of the poses from Jungle Poses for Gianni 6, and I dropped the Big Cat.
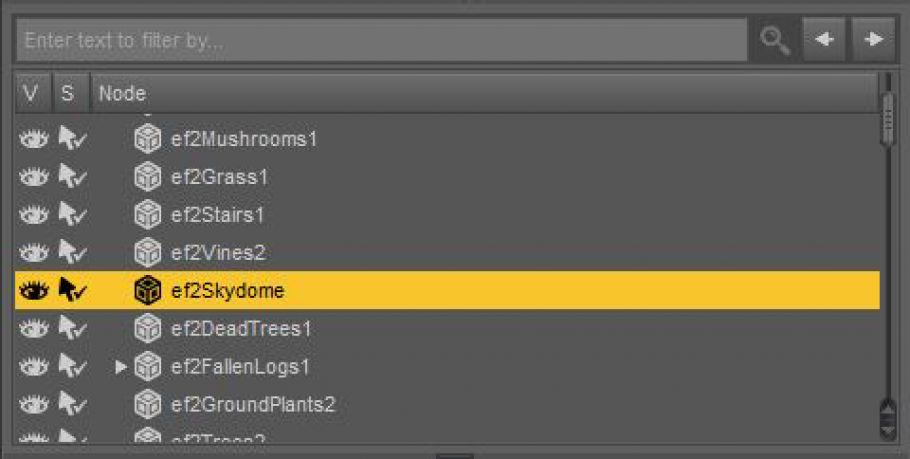
After loading the Return to the Enchanted Forest set, the first thing I do is go to the Scene tab and find the included skydome prop and remove it. Since I know I am going to be using the Iray Sun and Sky, the skydome is just going to get in the way of my lights. (see image to the left)
.

With that done, I look around the set for a likely spot to place my figure. I find one near the center of the prop with a little stream, some nice rocks and a bit of stone ruins in the back.
Next I load in Gianni. Luckily, the spot I chose is right near the center of the scene, so Gianni doesn't load in at some far-flung spot where I have to find him and re-position him. I choose my pose from the Jungle collection (#21) and I see that Gianni will just about fit on top of some of those rocks in the stream. I shift his positioning and tweak the pose so his feet are placed where I want them.
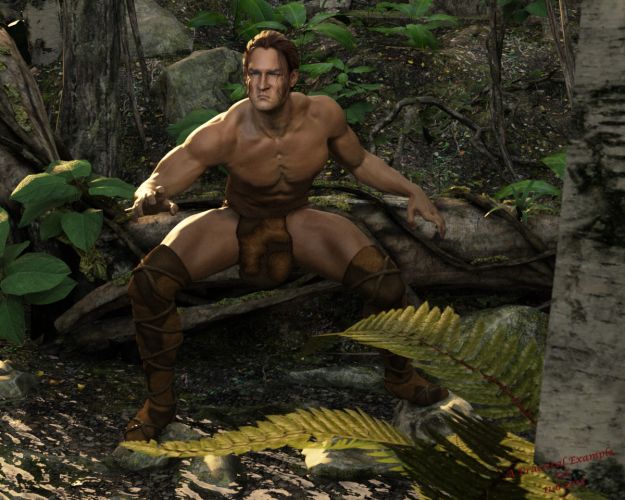
Ok. Basics are done. I have my figure and my set, now I need lights (hair, clothes and further tweak to pose and expression will come later, but the image to the left shows the final pose with everything because I didn't want to show Gianni in the buff).
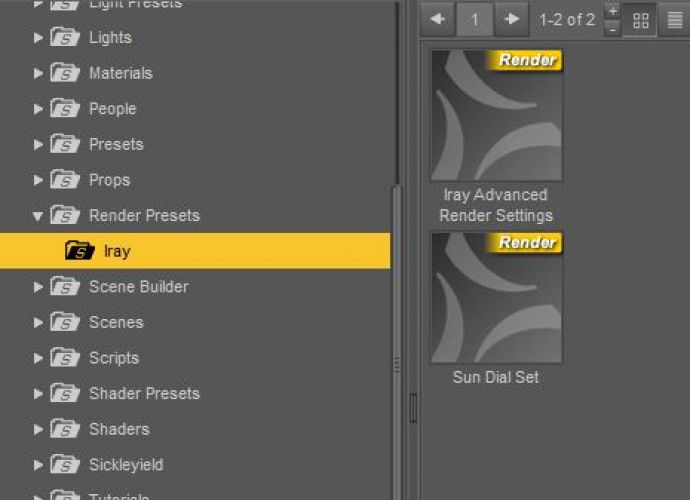
From my Content Library, I find Render Presets and then Iray and load the Sun Dial. This is a nifty little tool for quickly lining up the sun in your scene, but there are a few things one needs to know about using it:
- By default, DAZ Studio loads an HDRI image in the Environment tab of the Iray Render Settings. This disables Sun and Sky. One has to remove this image in order to activate Sun and Sky (if you have already loaded the Sun Dial prop, the Sun Node will show the correct Sun geometry; if you remove the HDRI before loading the prop, you may have to choose the Sun)
- Placement of the Sun Dial prop in the scene is mostly irrelevant; you can place it anywhere.
- The light of the sun is effected by the Elevation and Azimuth sliders on the Sun Chain geometry
- Rotation of the Dome on the Environment tab will also affect the light, but we will not be using that technique
 In order to get to the controls for the Sun Dial that actually control where the light enters your scene from, you have to drill down to the Sun Chain. I'm going for a Golden Hours type light (just after dawn or just before dusk), and based on my figure's scene position and pose, I want the sunlight coming from behind and to the figure's right to give me some nice back and rim lighting. So using my Elevation and Azimuth controls, I move the sun into position.


I take a quick Interactive render of the scene and I like what I have (ok, honestly it took 3 tries) for the basics of the light, but I want to tweak it just a little more. I'm going for early morning, rain forest light here. I want hot and humid. So I tweak the SS settings just a bit, sliding the Blue/Red over towards Red and bumping up the Haze. Much better.
But Gianni is not particularly well lit. That's kind of to be expected, since we placed the dominant light behind him and there is a significant amount of geometry between the "sky" part of the Sun and Sky and Gianni.
 I have a couple of options here and I'm going with MY first choice: Tone Mapping (the standard first choice seems to be: throw more light at the problem by adding lights or turning up the intensity of the lights... bad choices at this stage of the game). Using Tone Mapping will allow me to effect the overall image without actually changing the lights.
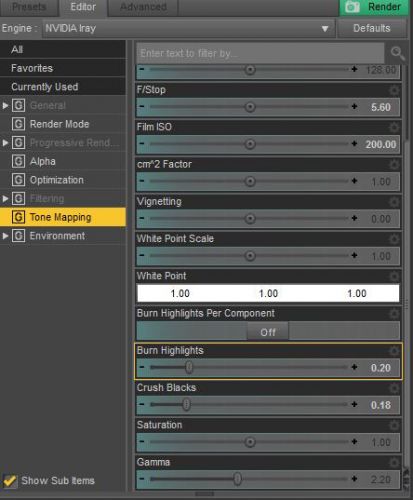
I'm going to change just two settings: ISO and Aperture. ISO represents the "speed" of the film, or how fast it reacts to light to capture an image. Since I need to brighten this up, I am going to increase the film speed to 400. The aperture controls how much light is allowed in during the time the "photograph" is taken (since this is all virtual, these settings are aproximations of real-world photography... this is, after all, a photo-real render engine... what else would it mimic but a camera?); so I want to let more light in, I am going to lower the aperture, which actually mean a larger aperture allowing more light in. I set the aperture to 5.6.
 And that's too much. So I raise the aperture to 6, and I like the result much better.
 I can't stop here... Gianni is still barely lit, and he is the focal point of the image. Now is when I start to add lights, to give Gianni some definition and draw the eye to him. I use my Perspective View to look down on Gianni and just off to the side. Then I create a Spot Light and have it copy the transforms of the Perspective View. Here's a little psychology for you: we expect to see a light source coming from above and to the side. Why? I don't know... but it looks "right" to us. So I'm putting my spotlight here. Positioning the spotlight, above and to the side... and opposite my sun.
 I've already got a warm light to the scene, so I don't want my spotlight to give me a white light...turning the Temperature down from the default of 6500 will give me a warmer light; I set it for 4500. Next I select my geometry; I know I need a broad, area light so I choose rectangle. I want to keep it small, so the light isn't too diffuse, so I set its size at 25x25, but I increase the spread angle to 85. The default of 1500 lumens is just not bright enough in this outdoor setting, the Sun and Sky are just going to eat that, so I bump that up to 3000.
I'm going to break here, as this is getting kind of long. I'll see you later with Part 2.
Here's a list of the other products I used in this scene.